

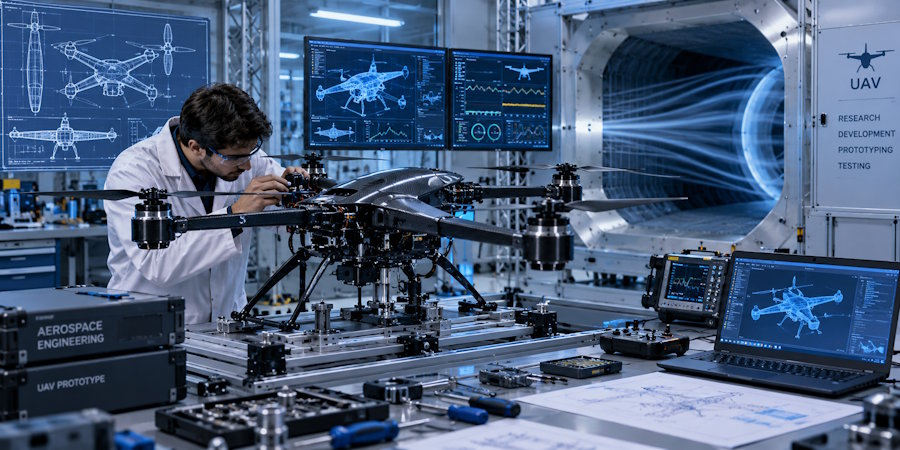
A finished drone looks simple from the outside. Four rotors, a body shell, a camera gimbal, and a controller. What most people never see is the months of engineering work behind that clean exterior. Building a UAV prototype involves structural testing, electronics integration, software validation, and repeated redesign before a single unit is ready to fly reliably.
This article breaks down the actual manufacturing journey of a UAV prototype, stage by stage, and explains why each phase matters for performance, safety, and cost control.
Why UAV Prototyping Is Different From Standard Product Development
Unlike most consumer electronics, a drone has to fight gravity while carrying sensors, batteries, and payloads. Every gram added to the frame changes flight time, stability, and control response. Engineers cannot simply build a working model and refine it later. They need to validate weight distribution, thermal behavior, and signal integrity before the first test flight even happens.
A single design flaw at the prototype stage can cascade into certification delays, safety failures, or complete redesigns during production. That is why UAV manufacturing follows a stricter and more iterative process than most hardware categories.
Stage 1: Concept Validation and Requirements Mapping
Before any part is machined or printed, engineers define the mission profile. This includes payload capacity, flight range, environmental conditions, and regulatory constraints. Requirements at this stage directly shape material selection and airframe geometry later in the process.
Key deliverables at this stage include:
- Flight performance targets (range, altitude ceiling, payload weight)
- Environmental operating conditions (temperature, wind resistance, dust or water exposure)
- Regulatory classification (recreational, commercial, or defense-grade)
- Preliminary bill of materials
Stage 2: Structural Design and Material Selection
Frame design determines how the UAV handles vibration, impact, and thermal stress. Engineers typically choose between carbon fiber composites, aluminum alloys, or reinforced polymers depending on the weight-to-strength ratio required.
| Material | Strength-to-Weight Ratio | Common Use Case | Relative Cost |
|---|---|---|---|
| Carbon Fiber Composite | Very High | Long-range and commercial UAVs | High |
| Aluminum Alloy | Moderate | Industrial inspection drones | Medium |
| Reinforced Polymer | Low to Moderate | Consumer and hobbyist UAVs | Low |
| Titanium Alloy | High | Defense and heavy-payload UAVs | Very High |
This stage also involves finite element analysis to simulate stress points before physical parts are manufactured, reducing the risk of structural failure during flight testing.
Stage 3: Electronics Integration and Wiring Architecture
Once the frame is finalized, engineers integrate the flight controller, electronic speed controllers, GPS module, and communication systems. Wiring layout matters as much as component selection. Poor routing can cause electromagnetic interference, which affects GPS accuracy and video transmission.
Common integration checkpoints include:
- Flight controller calibration and firmware flashing
- Motor and ESC synchronization testing
- GPS and compass interference checks
- Battery management system validation
Stage 4: Software and Firmware Development
Modern UAVs depend on firmware for stabilization, obstacle avoidance, and autonomous navigation. Software engineers work alongside hardware teams to ensure sensor data from gyroscopes, accelerometers, and barometers translates into smooth, predictable flight behavior.
This stage typically runs in parallel with hardware assembly rather than after it, since firmware bugs often surface only once real components are connected.
Stage 5: Bench Testing Before Flight
No prototype goes straight to the sky. Bench testing verifies motor output, battery discharge rates, thermal limits, and signal range in a controlled environment. This step catches a large percentage of design flaws before they become safety risks.
Typical bench tests include:
- Static thrust measurement
- Battery load testing under sustained draw
- Signal range testing with obstructions
- Thermal imaging of motors and ESCs under load
Stage 6: Flight Testing and Iteration
Flight testing is where theoretical design meets real-world physics. Engineers run controlled test flights to evaluate stability, responsiveness, and payload handling. Data from onboard sensors is logged and reviewed after each flight to identify tuning adjustments needed in the flight controller software.
It is common for a UAV prototype to go through several redesign cycles at this stage, particularly around center-of-gravity balance and vibration dampening.
Stage 7: Design for Manufacturing (DFM)
Once the prototype performs reliably, the design moves into a manufacturing review. Engineers assess whether parts can be produced at scale using injection molding, CNC machining, or automated PCB assembly, rather than the prototyping methods used earlier, such as 3D printing.
This stage often results in part consolidation, tolerance adjustments, and supplier sourcing decisions that affect final unit cost.
Common Mistakes That Delay UAV Prototype Development
- Skipping structural simulation and relying only on physical testing
- Underestimating electromagnetic interference between components
- Choosing materials based on cost alone without weight analysis
- Delaying firmware development until hardware is fully assembled
- Insufficient bench testing before flight trials
For teams that want a complete technical breakdown of a real project, the full engineering write-up of this project documents every design decision, test result, and iteration made during development.
Why Manufacturing Partner Experience Matters
UAV prototyping requires coordination between mechanical engineers, electronics specialists, and software developers, often across multiple facilities. Working with a manufacturing partner that understands aerospace tolerances and certification requirements reduces the number of redesign cycles needed before production.
Teams evaluating a manufacturing partner should review our aerospace manufacturing capabilities to understand how prototyping, testing, and production scaling are handled under one process.
FAQs
How long does it take to build a UAV prototype?
Most UAV prototypes take between four and nine months to complete, depending on payload complexity and certification requirements.
What is the most expensive stage of UAV prototyping?
Structural design and material selection typically carry the highest cost, especially when carbon fiber composites or titanium components are involved.
Do UAV prototypes require certification before testing?
Certification requirements depend on the drone's classification and intended use. Commercial and defense-grade UAVs generally require regulatory approval before extended flight testing.
Why do UAV prototypes go through multiple redesign cycles?
Flight testing often reveals issues with center-of-gravity balance, vibration, or signal interference that are not visible during bench testing alone.
What materials are best for lightweight UAV frames?
Carbon fiber composites offer the best strength-to-weight ratio for long-range or commercial UAVs, though reinforced polymers remain popular for lower-cost builds.
How does firmware development affect UAV manufacturing timelines?
Firmware issues often surface only once hardware is assembled, which is why software teams typically work in parallel with hardware development rather than after it.
What is Design for Manufacturing in UAV development?
Design for Manufacturing is the process of adapting a working prototype into a design that can be produced at scale using methods like CNC machining or injection molding.

