

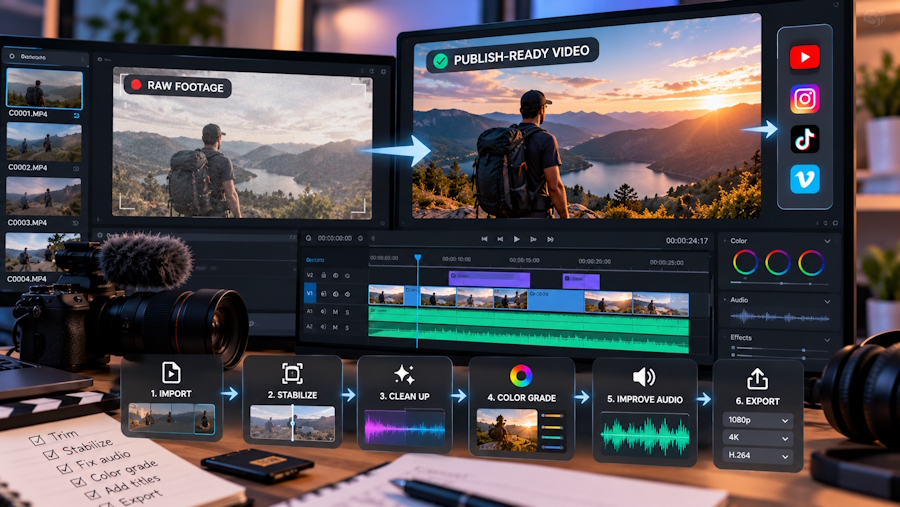
Define the Publishing Goal Before Choosing a Tool
Start by identifying where the video will appear and what job it must perform. A short social clip, product-page demonstration, course lesson and event recap have different requirements for duration, framing, captions and image quality.
Review the entire source before editing. Note outdated graphics, unwanted objects, background problems, soft sections, exposure shifts, camera movement and audio issues separately. This produces a repair list instead of a vague instruction to make the video look professional.
Confirm that the footage is owned or licensed for the intended use. Cleanup tools should not remove another creator's ownership marks or disguise the origin of material.
Remove Obsolete Overlays Only When the Edit Is Authorized
Older footage may contain a date, price, temporary logo, subtitle, sticker or campaign message that prevents reuse. When the publisher owns the footage and has permission to alter the marked area, a watermark remover can help clean a defined overlay or unwanted object before current graphics are added.
Select the smallest practical region and inspect the surrounding movement. A static mark over a plain wall is usually easier to reconstruct than text crossing a face, hand or patterned product. Watch several frames before and after the affected moment because a repair that looks acceptable in one frame may flicker during motion.
Do not treat every mark as clutter. A copyright notice, broadcaster identifier, documentary timestamp or source attribution may be essential context. Keep the cleaned result as a derivative so reviewers can compare it with the source.
Rebuild the Composition Around the Foreground Subject
Once obsolete elements have been handled, decide whether the original setting supports the new use. A presenter recorded in a busy room may need a neutral design for a course. A product demonstration may need a consistent background across horizontal and vertical versions.
A video background remover can isolate a presenter or foreground subject so the editor can place it over a transparent, solid or replacement background. The new setting should solve a composition problem, not merely demonstrate that the background can be changed.
Review difficult boundaries throughout the clip. Hair, glasses, fingers, translucent objects, motion blur and shadows can expose unstable segmentation. Check the subject against both light and dark test backgrounds; an edge that disappears on one color may become obvious on another.
Lock the Edit Before Enhancing Quality
Enhancement should happen after the usable scenes, crop and background have been selected. Processing every experimental version wastes time and may make comparisons harder. Lock the sequence first, while retaining enough resolution for the final aspect ratio.
Avoid repeated exports between stages. Each compression pass can soften edges and reduce the information available to later processing. Use a high-quality intermediate file, then create delivery versions after the master passes review.
Enhance the Selected Master for Its Real Destination
After the composition is stable, an ai video enhancer can be used to address specific problems such as low resolution, weak brightness, soft detail or uneven color. Begin with the smallest improvement that makes the clip usable for its destination.
Compare the result with the source at normal playback speed. Pause on faces, hands, product text, fabric, foliage and repeated patterns. These areas can acquire invented detail, halos or temporal shimmer even when a single frame appears sharper.
Review the Video as Motion, Not a Collection of Frames
Quality checks should include full-speed playback, slow inspection of repaired regions and viewing on the device where the audience will encounter the clip. Look for flicker, edge chatter, background leakage, sudden changes in sharpness and inconsistent grain.
Audio must remain synchronized after processing and export. Check dialogue, captions and safe areas, then test the downloaded file in an ordinary player rather than relying only on the tool preview.
Create Separate Masters for Different Formats
One finished sequence may require horizontal, square and vertical outputs. Build them from the approved master rather than applying independent cleanup to each version. This keeps repaired areas, color and enhancement decisions consistent.
Reframe intentionally rather than simply cutting the center of a horizontal frame. Keep a clean master without permanent campaign copy so new titles and calls to action can be added without repeating the cleanup cycle.
Maintain an Edit Record and Final Approval
Use filenames that identify the source, cleanup stage, aspect ratio and revision. Retain the original footage, cleaned intermediate, isolated-subject version, enhanced master and delivery exports separately.
Final approval should answer four questions: Is the footage authorized for this use? Are all reconstructed areas visually stable? Does the video still represent the real subject accurately? Does the exported file meet the destination's technical and disclosure requirements?
Video cleanup works best when every tool has a narrow responsibility. Overlay removal prepares authorized footage for reuse, background separation creates a flexible composition and enhancement improves the selected master. The workflow becomes dependable only when the original remains available, each stage is reviewed in motion and human approval determines whether the result is ready to publish.

