

The POS app is configured, the menu is loaded and the test transactions went through on your desk. Then you set the iPad up at the counter, and the problems start. The card reader cable won't reach, the screen faces the wrong way for customers, and nobody can remember where the key for the enclosure went.
Most kiosk problems are hardware problems that a short checklist would have caught. If you're building the setup for a client or rolling it out across several locations, these seven checks will help the checkout work for customers and staff from day one.
Check #1 - Confirm Tablet and POS App Compatibility
Compatibility comes first, because everything else in the setup depends on the exact tablet model and the POS software. A stand, case or card reader that fits one iPad generation may not fit the next.
Before you order hardware, confirm:
- The exact iPad model and generation, including screen size
- The minimum iPadOS version your POS app supports
- Which card readers and printers the POS app officially supports
- How peripherals connect, such as Bluetooth, USB-C or Lightning
- Whether the app supports a single-app or guided access mode
Check the POS vendor's hardware list rather than relying on a generic compatibility claim. Write down the exact model numbers for every device in the setup, so future replacements match.
Check #2 - Plan Customer-Facing Height and Reach
A customer-facing kiosk needs to sit where every customer can see and reach it. That affects the counter position, the stand height and how far the screen sits from the counter edge.
If customers will tap the screen, sign or enter a PIN, think about accessibility from the start. The 2010 ADA Standards for Accessible Design set the unobstructed forward reach range with the high point at 48 inches maximum and the low point at 15 inches minimum above the floor. Check how your counter height and stand combine against that range, especially for customers using wheelchairs.
Glare matters too. Stand at the counter at different times of day and check whether windows or overhead lights wash out the screen.
Check #3 - Choose the Stand and Enclosure
The stand and enclosure hold the whole checkout together, so choose them as part of the full setup, not as an accessory. The right option depends on your counter space, how customers approach and whether the screen needs to move.
Countertop Stands
Countertop stands suit most retail and café counters. Fixed models are the most stable, while rotating ones let staff turn the screen for customers to tip, sign or confirm a total.
Wall and Freestanding Mounts
Wall mounts free up counter space in tight venues, and freestanding stands work for self-service ordering points away from the main counter.
Rotation is where many setups succeed or fail. If you're comparing mounts for an iPad POS system from VidaBox, for example, some of its stands tilt and swivel so you can switch between cashier and customer-facing modes. Test the full range of movement with the card reader and cables attached, since a stand that turns freely on its own can snag once everything is plugged in.
Check #4 - Test Every Payment Peripheral
Payment peripherals turn a tablet into a checkout, and each one needs to work with the stand, the app and the counter layout. Test them together, not one at a time on a desk.
Peripherals to check in place:
- Card reader, including tap, chip and swipe
- Receipt printer and paper loading space
- Cash drawer and how it's triggered
- Barcode scanner, if you sell packaged goods
- Customer display or second screen, if used
Run real test transactions at the counter, including refunds and split payments. Place every peripheral before you drill any holes, so you know the final layout works for staff.
Check #5 - Plan Power and Cable Routing
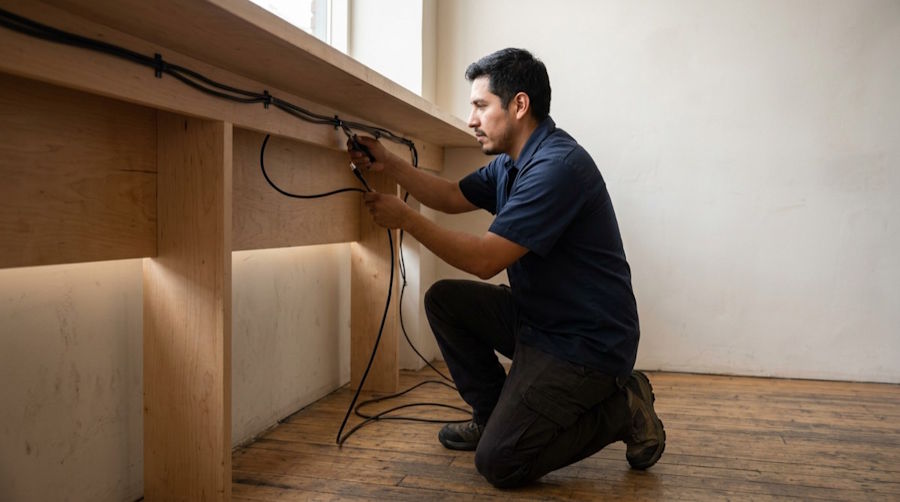
Power and cable routing decide whether the kiosk stays charged and looks tidy, and whether a customer's bag can pull a cable loose. Plan both before installation day.
Keep the iPad charging during business hours, and confirm the power adapter supplies enough power for the tablet and any connected accessories. Measure each cable run to the outlet or hub, and leave slack if the stand rotates. Route cables through the stand or under the counter where possible, and use clips or covers anywhere a cable is still exposed.
Label each cable at both ends. When something stops working during a rush, staff can find the right plug in seconds.
Check #6 - Secure the Tablet and Card Reader
Security covers both theft and tampering, and a busy counter makes both easier. Lock the tablet into its enclosure and secure the stand to the counter so neither can be lifted away.
Card readers need extra attention. The Secret Service warns that criminals install illegal skimming devices on ATMs, gas pumps and merchant point-of-sale terminals to steal card numbers. Its advice to look for anything loose, crooked, damaged or scratched is a useful starting point for a staff check.
On the software side, lock the iPad to the POS app, set a passcode and use device management to apply updates. Keep a log of every device's serial number and location, so you can spot a swapped or missing unit quickly.
|
Top Tip: Take a photo of each card reader and stand from the same angle on installation day and save it in a shared folder. Ask staff to compare the device against the photo at the start of each shift. It takes a few seconds, and any added overlay, loose part or new cable becomes much easier to notice. |
Check #7 - Plan Service Access
Service access is easy to forget until the first time someone needs to remove the iPad for an update or repair. Plan how staff will get to the device without taking the counter apart.
Agree on these points before deployment:
- Who holds the enclosure keys or tools
- How to remove the iPad without disconnecting the whole setup
- Where a spare tablet or card reader is kept
- Who to call for hardware faults during opening hours
Document the steps in a short guide with photos and keep it near the counter. Do a practice swap before go-live to confirm a staff member can replace the iPad in a few minutes.
Run the Checklist on Your Test Setup This Week
Set up one complete kiosk with the exact tablet, stand, card reader and printer you plan to deploy. Then work through all seven checks at the counter before you roll it out to other locations.
Frequently Asked Questions
What should I check before deploying an iPad POS kiosk?
Check tablet and app compatibility, customer reach, the stand and enclosure, payment peripherals, power and cables, security and service access. Test everything together at the counter before go-live.
How high should a customer-facing POS screen be?
The 2010 ADA Standards set the unobstructed forward reach range at 15 inches minimum to 48 inches maximum above the floor. Check how your counter and stand height combine against that range.
How do I protect a POS card reader from skimming?
Lock the reader and stand in place, and ask staff to check for anything loose, crooked, damaged or scratched. Comparing the device against an installation photo makes changes easier to spot.