

If you write code for a living, you have probably watched image generation move from a curiosity you tried once on a weekend to something you now reach for during real projects. Placeholder art, UI mockups, marketing assets for a side app, textures for a game prototype: tasks that used to mean opening a design tool or hunting through stock libraries can now start with a sentence of plain text.
This article walks through how these systems actually work under the hood, how to design a workflow around them, and where they fit into a developer's toolkit. It stays practical and beginner-friendly, but it does not shy away from the mechanics, because understanding the pipeline is what lets you build something reliable rather than fiddling with prompts until something looks acceptable.
What Actually Happens When You Generate an Image
At a high level, a text-to-image model learns the statistical relationship between words and pixels. During training, it sees enormous numbers of image-and-caption pairs and gradually builds an internal map connecting concepts ("golden retriever," "rim lighting," "isometric") to visual patterns. When you type a prompt, the model uses that map to construct a new image that matches your description.
Most modern systems are diffusion-based. The idea is easier to grasp than the math suggests:
- The model starts with an image that is pure random noise, like TV static.
- Step by step, it removes noise in a direction guided by your prompt.
- After a set number of steps, the static has resolved into a coherent image.
Think of it as sculpting. The block of noise is the marble; your prompt is the instruction that decides which parts get chipped away. The number of steps, the guidance strength, and the random seed all influence the final result, which is why the same prompt can produce different images unless you pin those values down.
Two concepts worth knowing early:
- Seed: a number that fixes the starting randomness. Reuse a seed and you can reproduce or subtly vary a result instead of rolling the dice each time.
- Guidance scale: how strictly the model follows your prompt. Low values wander creatively; high values stick closely to your words, sometimes at the cost of natural-looking output.
Text-to-Image Versus Image-to-Image
There are two core operations you will use constantly, and knowing the difference is half the battle.
Text-to-image builds a picture from words alone. You describe what you want and the model generates it from scratch. This is your go-to for creating something new: a hero illustration, a concept sketch, a background.
Image-to-image takes an existing picture as a starting point and transforms it according to a prompt. You feed in a rough sketch, a screenshot, or a previous generation, and the model reworks it, changing style, filling in detail, or altering specific elements. This is where editing pipelines live, and it is often more useful for real work than pure generation, because most professional tasks involve refining something rather than conjuring it from nothing.
Here is how the two compare in day-to-day use:
|
Aspect |
Text-to-Image |
Image-to-Image |
|
Input |
Prompt only |
Prompt + source image |
|
Best for |
New concepts, blank-slate ideas |
Editing, refining, restyling |
|
Control over layout |
Lower |
Higher (source guides structure) |
|
Typical dev use |
Placeholder art, illustrations |
Mockup cleanup, style transfer, fixes |
|
Reproducibility |
Depends on seed |
Anchored by the source image |
A practical workflow usually chains them: generate a base with text-to-image, then run several image-to-image passes to correct, adjust, and polish.
Prompt Engineering Without the Mystique
Prompt engineering sounds intimidating, but for images it comes down to a few learnable habits. A weak prompt is vague ("a nice logo"). A strong prompt specifies subject, style, composition, and mood in a way the model can act on.
A reliable structure to start from:
- Subject: what the image is of. "A red fox curled asleep."
- Style: the visual treatment. "Flat vector illustration, minimal shading."
- Composition: framing and layout. "Centered, generous negative space, top-down view."
- Details and mood: the finishing touches. "Warm autumn palette, soft ambient light."
Put together: "A red fox curled asleep, flat vector illustration with minimal shading, centered with generous negative space, warm autumn palette, soft ambient light."
A few tips that consistently improve results:
- Be specific about what you want, not just what you like. "Muted teal and sand tones" beats "nice colors."
- Add negative guidance when the tool supports it. Telling the model what to avoid ("no text, no watermark, no harsh shadows") cleans up common artifacts.
- Iterate one variable at a time. Change the style but keep the subject fixed so you can tell what actually moved the needle.
- Lock the seed once you find a direction you like, then vary the prompt in small steps to refine without losing the composition.
Prompting is closer to writing a good function signature than casting a spell: clear inputs, predictable outputs, and small deliberate changes when something is off.
Designing an Image Editing Pipeline
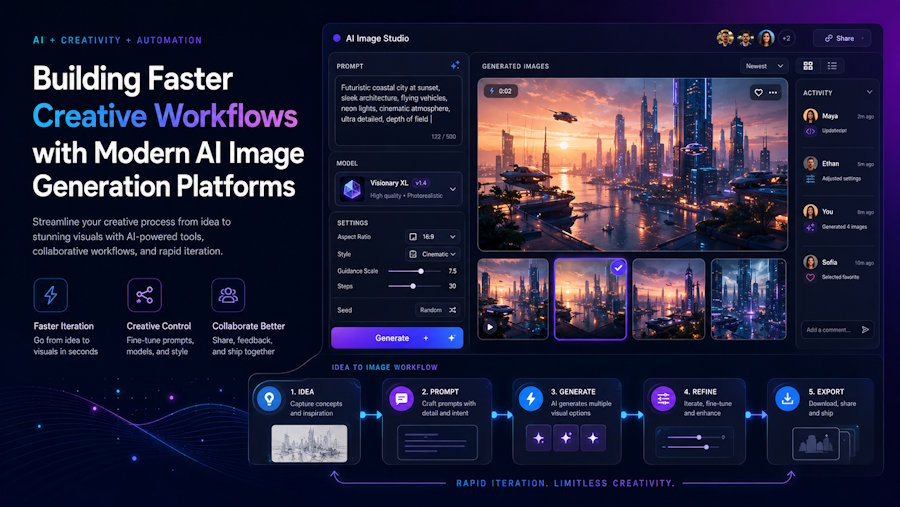
For anything beyond a one-off image, it helps to think in terms of a pipeline, the same way you would structure a data-processing job. A typical creative pipeline has distinct stages:
- Ideation — generate several rough directions with text-to-image at low guidance to see a range of options.
- Selection — pick the strongest candidate and record its seed and prompt.
- Refinement — run image-to-image passes to fix hands, adjust colors, remove clutter, or extend the canvas.
- Finishing — apply final edits like cropping, upscaling, or format conversion.
- Export — output the sizes and formats your project needs.
Structuring your work this way makes it repeatable. Instead of treating each image as a fresh gamble, you build a process that reliably takes you from idea to finished asset, and you can hand that process to a teammate without transferring a bag of undocumented tricks.
A platform that keeps generation and editing together makes this pipeline far smoother, because you are not exporting and re-importing files between stages. A text-to-image platform like Nano Banana 2, which supports both fresh generation and image-to-image editing in one place, lets you move from a rough concept to a refined result without stitching several tools together. That continuity matters more than any single feature when you are iterating quickly, since every context switch between apps is a small tax on your momentum.
API Possibilities and Automation
For developers, the real leverage shows up when image generation becomes something you can call programmatically rather than click through by hand. Once a platform exposes an API, a whole category of automation opens up.
Consider a few patterns:
- Batch generation. Loop over a list of product names or blog titles and generate a matching header image for each, writing the results straight to your storage bucket.
- On-demand assets. Generate a personalized image at request time, for example a social share card that includes the user's stats.
- Content pipelines. Wire generation into your CMS so that publishing an article automatically produces a set of accompanying visuals.
- Dynamic variation. Feed a base image through image-to-image with different style prompts to produce a family of themed variants for A/B testing.
The mental model is simple: treat image generation like any other service call. You send a request with your parameters, prompt, dimensions, seed, guidance, and you get back an asset you can store, transform, or serve. From there it composes with everything else in your stack, from cron jobs to serverless functions.
A minimal pseudo-flow for a batch job looks like this:
for title in article_titles:
prompt = build_prompt(title)
image = generate_image(prompt, size="1200x630", seed=fixed_seed)
save(image, path=f"headers/{slugify(title)}.png")
Nothing exotic here, and that is the point. Once generation is an API call, it slots into the same loops and queues you already use.
Developer Use Cases That Actually Pay Off
Beyond marketing art, there are concrete places where these tools save developers real time:
- Placeholder and seed content. Populate a prototype with realistic-looking imagery instead of gray boxes, so stakeholders react to something close to the real thing.
- Game and app assets. Generate icons, textures, tiles, and backgrounds for prototypes before committing to a professional art budget.
- Documentation and diagrams' companions. Produce clean illustrative visuals for tutorials and READMEs.
- Design exploration. Test multiple UI moods or theme directions quickly before building them out in code.
- Internal tools. Build a small dashboard where non-technical teammates generate on-brand images without touching a design app.
The common thread is lowering the cost of visuals from "requires a designer and a schedule" to "requires a prompt," which changes what you are willing to attempt.
Practical Tips for a Faster Workflow
If you want to get productive quickly, a handful of habits go a long way:
- Keep a prompt snippets file. Save the phrasings that reliably produce the styles you use most, just like reusable code snippets.
- Version your seeds and prompts. Record what produced a given asset so you can reproduce or tweak it later.
- Automate the boring exports. Script your resizing and format conversion instead of doing it by hand each time.
- Batch similar work. Generating ten related images in one session is faster than ten separate context switches.
- Review before shipping. Models occasionally produce odd artifacts; a quick human check keeps quality consistent.
Conclusion
Modern AI image generation is not magic, and understanding the pipeline, diffusion, seeds, guidance, and the split between text-to-image and image-to-image, is exactly what turns it from a toy into a dependable part of your workflow. Once you think in terms of pipelines and API calls, generating visuals becomes just another composable step in the way you already build software.
The developers getting the most from these tools are not the ones with the cleverest prompts. They are the ones who wrapped generation in a repeatable process: clear prompt structures, versioned seeds, a sensible editing pipeline, and automation where it counts. Start small, script the parts you repeat, and keep a human eye on the output. Do that, and you will spend far less time wrestling with visuals and far more time shipping.
Frequently Asked Questions
1. Do I need machine learning knowledge to use AI image generation? No. You can be highly productive without understanding the model internals. Knowing the basics, seeds, guidance, and the difference between text-to-image and image-to-image, is enough to build reliable workflows and troubleshoot when results drift.
2. What is the difference between a seed and a prompt? The prompt describes what you want; the seed fixes the random starting point of the generation. Same prompt plus same seed gives you a reproducible image, which is essential when you want to make small, controlled changes rather than start over each time.
3. Can I integrate image generation into my own application? Yes, when the platform exposes an API. You send a request with your parameters and receive an image back, which you can store or serve like any other asset. This enables batch jobs, on-demand generation, and CMS-integrated content pipelines.
4. When should I use image-to-image instead of text-to-image? Use text-to-image to create something new from a description. Use image-to-image when you already have a source, a sketch, screenshot, or prior generation, and want to refine, restyle, or edit it while preserving its structure. Most real workflows chain both.
5. How do I make my results more consistent across a project? Lock your seeds, reuse a documented set of prompt patterns, and standardize your export step. Building a defined pipeline, ideation, selection, refinement, finishing, export, keeps output predictable and makes the process easy to hand off to teammates.

