

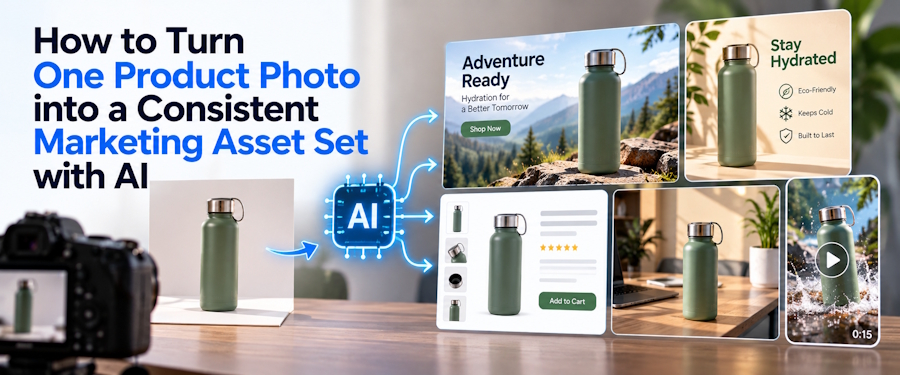
Most product teams have one approved product photo and a long list of places that need images: social posts, display ads, email banners, marketplace listings, seasonal campaigns, and landing pages. AI image editing can produce all of these from that single photo, and it can do it quickly. What it does not do automatically is keep the product accurate while the scene around it changes. A bottle that gains a second dropper, or a label with one wrong letter, is not a usable asset, no matter how good the lighting looks.
This guide walks through a repeatable workflow for turning one product photo into a coordinated set of marketing images. To keep it concrete, it follows one example throughout: LUMA Night Repair Serum, a sample product we created for testing. It is a 30 ml frosted amber glass bottle with a black dropper and a small cream label, which makes it a good stress test. Glass, reflections, and small printed text are exactly the details AI editors tend to change.
1. Plan the Asset Set Before Generating Anything
Begin with the campaign requirements, not the AI tool. List every channel that needs an image, the required aspect ratio, the final dimensions, and the purpose of each asset. A practical starter set includes a square social post, a vertical story, a landscape email banner, a wide website hero, and a clean marketplace image.
For each format, decide where the product should sit and how much empty space the copy needs. A website hero may place the product on the right so a headline fits on the left. A vertical story usually needs the product in the lower half, away from the app interface. Planning these constraints early cuts down on wasted generations and makes the final set look intentional.
Separate required assets from experiments. Produce the core product and campaign images first, and explore bolder styles only after the core set has passed review.
2. Choose a Strong Source Photograph
The source photo sets the limit on how much reliable detail the editor can work with. Use the highest-resolution approved image available. The product should be in focus, evenly lit, and large enough to show its silhouette, materials, label, and distinctive details. Avoid heavy compression, motion blur, clipped edges, and shadows that hide important parts.
The LUMA source was a plain catalog shot: the bottle upright and centered on a white background, with soft even lighting and no props. The most fragile detail is the second line of the label, "Night Repair Serum · 30 ml", printed in small caps. If that line is not sharp in the source, no prompt will reliably keep it sharp in the output.
Keep the original file unchanged and give it a clear name. Every generated asset should be traceable to that file, so that any correction can restart from the approved photo instead of from an already edited version.
3. Define What Must Stay Consistent
Before writing a creative prompt, make a preservation list: the elements that are not allowed to change. For a physical product, it usually includes:
- the product's shape and proportions;
- logo placement and label text;
- brand colors and material finish;
- the number and position of components;
- camera angle and product orientation;
- distinctive packaging details;
- any legally required marks or claims.
Then write a change list describing what the AI may modify, such as the background, surface, props, lighting mood, crop, or season. Finally, add a forbidden list: no extra products, no redesigned logo, no invented text, no altered cap, and no duplicated accessories.
For LUMA, the three lists fit into a single instruction:
Preserve: the frosted amber glass bottle, the black dropper, the label text "LUMA" and "Night Repair Serum · 30 ml", the bottle proportions, and the camera angle. Change: the background, surface, props, and lighting. Forbid: extra bottles, new text, and any change to the label or the cap.
This preserve, change, forbid structure is more dependable than a prompt that only describes a mood. It also gives reviewers a ready-made checklist and makes failed outputs easier to diagnose.
4. Build One Neutral Master Composition
Do not generate every channel asset separately from the original photo. First build one master composition that sets the campaign's visual direction: background style, light direction, shadow behavior, and color palette. The master is a working file that later formats are adapted from, so it should be larger than most final placements.
The LUMA master placed the bottle on a slab of honed travertine next to a shallow ripple of water, with two dried blood orange slices, a sprig of rosemary, and low afternoon sun casting palm-leaf shadows across the stone. Before accepting it, we checked the bottle at full size. The amber glass, the single black dropper, the bottle proportions, and both lines of label text matched the source. The scene had changed completely, and the product had not.
The original LUMA catalog photo and the approved master scene. The bottle, dropper, proportions, and two-line label remain consistent while the environment changes.
That inspection is the whole point of this step. An attractive scene is not a valid master if the product inside it has drifted.
5. Generate Controlled Variations
Change one major variable at a time. If a single request changes the background, crop, lighting, props, and angle together, it becomes hard to tell why an output failed. A controlled sequence is easier to review:
- Replace the background while preserving the product and camera angle.
- Adjust the lighting while keeping the approved background and product unchanged.
- Adapt the composition to a new aspect ratio without redesigning the scene.
- Add or remove supporting props without covering the product.
- Create seasonal versions only after the baseline composition is approved.
A browser-based workspace such as Nano Banana Pro can be used to test reference-image editing, aspect ratios, output resolutions, and visual variations before a team commits to a full production batch. Record the settings and the exact prompt for every approved result so the workflow can be repeated later.
Run important variations more than once. AI output is probabilistic, so one good image does not prove that a prompt is reliable. Repeated runs show whether the product stays stable or whether a good result was luck.
6. Adapt the Master for Each Channel
Once the master is approved, create channel-specific versions from it instead of relying on automatic cropping. Each format has different priorities. A square social post needs the product centered with room for a short headline. A vertical story needs key details kept away from the top and bottom interface areas. A landscape email banner works best with the product off-center and a calm area for copy. A marketplace image needs a simple background and puts accuracy ahead of atmosphere.
When extending a background, tell the editor to keep the subject at its current size and position. For the LUMA story format, the instruction was along these lines: extend the travertine scene upward to a 9:16 frame, keep the bottle at its current size in the lower half, and leave the top third clear for a headline. Naming both the new ratio and the area that must stay empty prevents the AI from enlarging, rotating, or redesigning the product to fill the canvas.
7. Review Every Asset at Full Resolution
Small previews hide errors. Open each candidate at 100 percent and compare it directly with the source photo and the approved master. Reviewers should check:
- product geometry, edges, and component count;
- logo accuracy and text legibility;
- brand color and material texture;
- realistic reflections and shadow direction;
- unexpected objects, duplicates, or artifacts;
- safe space for headlines and interface elements;
- required dimensions and aspect ratio.
For the serum bottle, three checks mattered most: the dropper (one, black, same length), the label text read letter by letter, and the color of the glass, which shifts easily under warm light.
Sort problems by severity. A small background texture error can be retouched. A changed logo, a warped package, a false product claim, or a wrong component is a critical failure, and that asset should be regenerated from the approved source. Automated checks can confirm dimensions, file type, and sometimes text through optical character recognition, but only a person can decide whether an image truthfully represents the product and fits the brand.
8. Measure Cost per Approved Asset
The cheapest generation is not always the cheapest usable image. Track the number of attempts, credits used, review time, and manual cleanup for each approved asset, then divide the total cost by the number of outputs that actually pass review.
This number exposes weak prompts and difficult product categories. If a glass bottle needs eight attempts while a fabric product passes on the second, the process should treat them differently. Some assets are still better produced with traditional photography or compositing, especially when exact text, transparent materials, or regulated claims are involved.
9. Save the Workflow, Not Just the Images
A reusable campaign system keeps the original source, the preservation rules, prompt versions, generation settings, the approved master, rejected examples with the reason they failed, and the final exports. Version these records instead of overwriting them. The next campaign then starts from proven instructions rather than repeating the same experiments, and over time the team builds a library of workflows for different product types, seasons, and platforms.
Conclusion
A consistent asset set comes from control, not from volume. Plan the formats, protect the details that define the product, build one master, change one variable at a time, and inspect every result at full size. With the source, the rules, the prompts, and the review criteria written down, AI editing becomes predictable enough to schedule and budget, and the product looks the same in every channel it appears in.

