
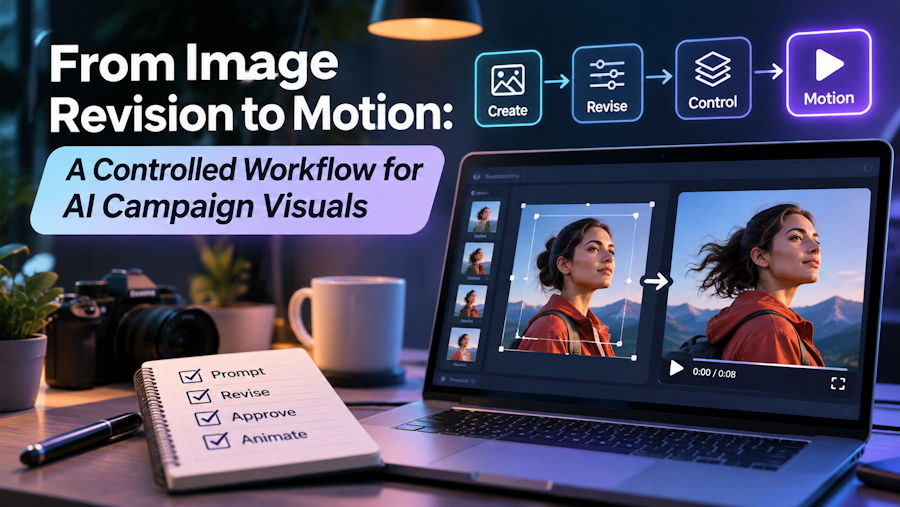
The most reliable way to create motion from an AI-edited image is to approve the still before generating video. A nano banana step can be positioned as the first controlled checkpoint, where composition, subject details, lighting, and campaign style are locked before the motion brief introduces new variables.
The approved image can then move into a dream machine ai workflow for camera movement, subject action, scene rhythm, and format testing. Separating image revision from animation makes errors easier to diagnose and prevents a weak source visual from turning into a series of inconsistent clips.
Lock the Still Image Before Adding Motion
List the details that must remain unchanged: face identity, product shape, packaging color, logo placement, wardrobe, background geometry, or illustration style. Edit one category at a time and compare every revision with the source. If the still contains a mistake, video generation is likely to amplify it across frames.
Create a simple approval sheet with the source, revised image, change request, and reviewer decision. This may feel slower than moving directly to video, but it prevents repeated generations based on an asset nobody formally accepted.
Write a Motion Brief, Not Another Image Prompt
The motion instruction should describe what changes over time. Specify camera direction, subject movement, environmental motion, pace, and what must remain still. “Slow push-in while soft window light moves across the packaging; product remains centered and unchanged” is testable. “Make it cinematic and viral” is not.
Use restrained movement for detail-sensitive products and more expressive motion for backgrounds or abstract scenes. When typography or labels must be exact, plan to use a verified still or conventional overlay rather than relying on generated frames to preserve every character.
Build a Sequence from Independent Shots
A campaign may need an opening image, identity shot, feature moment, lifestyle transition, and closing frame. Generate and approve them separately, then assemble the selected clips in an editor. This scene-based method makes it easier to replace one weak shot without losing the rest of the sequence.
Keep a shared palette, light direction, lens feeling, and subject scale across the briefs. Consistency comes from repeated constraints and review, not from repeating an oversized prompt.
Define the Job Before Selecting Settings
The starting question is not which model or preset looks most impressive. It is what decision the finished asset or report must support. For ecommerce teams, designers, illustrators, social creators, agencies, and small creative studios, the recurring challenge is keeping a product, character, or visual identity consistent while moving from still-image revisions into short generated video. Write that job in one sentence and name the person who will approve the result.
Prepare an approved source image, a focused edit instruction, a separate motion brief, and a record of details that cannot change. Source quality sets the ceiling for the workflow. A vague prompt, noisy recording, inconsistent photo, unsupported claim, or incomplete technical requirement cannot be repaired reliably by adding more settings. Record the source and the non-negotiable details before the first run.
Define the expected output as a refined still and short video candidates that can be compared for composition, reference fidelity, motion, and channel fit. This keeps the team from confusing a polished preview with a finished deliverable. It also establishes where conventional editing, verification, reconstruction, or layout work will still be required.
Use High-Frequency Search Language as Reader Questions
Readers commonly search for Nano Banana, Dream Machine AI, AI image editor, image to video, AI video generator, product photography, AI marketing images, character consistency, cinematic video, and social media visuals. Those phrases should appear where they clarify the task: in the title, opening answer, relevant subheading, definition, or example. Repeating the same keyword in every paragraph weakens the article and makes the linked product feel forced.
Build topical depth by answering adjacent questions. Explain the best input, the step-by-step workflow, the most common failure, the review criteria, the limitations, and the point at which a human must decide. This structure is more valuable to a searcher than a list of features because it helps the reader complete a real job.
Use related terms naturally and accurately. A category phrase can introduce a tool, while task language explains why it belongs in the process. Avoid unsupported “best,” “fastest,” or “most accurate” claims. Search visibility earned through useful explanation is more durable than exaggerated copy.
Run a Controlled First Test
Choose one representative example, such as a campaign that needs to place one product in a cleaner environment, approve the still, and then animate a restrained reveal for a vertical social placement. Write acceptance criteria before using the tool. The criteria should describe visible, audible, factual, or functional qualities that a reviewer can check. They should not be vague goals such as “make it professional” or “get a good result.”
Run one focused attempt, record the settings, and compare the result with the source. If it misses the objective, change one meaningful variable at a time: improve the source, narrow the instruction, choose a different mode, or adjust the destination format. Changing everything at once produces more outputs but less learning.
The purpose of the first test is to discover which parts of the workflow are stable. A successful candidate should be repeatable enough that another person can understand why it passed. If approval depends only on one creator’s memory, the process will break when the team scales.
Review the Result Where It Will Be Used
Inspect identity, product labels, geometry, hands, typography, lighting direction, shadows, background continuity, aspect ratio, motion path, and the final frame. Review in context: place the video inside a vertical feed, listen to the candidate beside the suspected release, rotate the game asset, read the AI answer with its cited page, open the public evidence, or place the image in the actual layout. Destination context reveals failures that a standalone preview hides.
A useful status system has three labels: candidate, checked, and approved. A candidate came from the tool but has not been verified. A checked result passed the defined technical or factual review. An approved result is fit for the named destination and has the necessary rights and permission.
Do not lower the review threshold simply because generation was fast. The most common failure in this category is asking a single prompt to change the product, redesign the scene, invent copy, and create complex motion at the same time. Treat that risk as part of production, not as a disclaimer added after the decision.
Keep an Audit Trail for Iteration and Handoff
For every run, save the brief, source, link or file, settings, result, review note, and final decision. The record does not need to be elaborate. A compact table is enough to show what changed, who checked it, and why one candidate moved forward.
This audit trail reduces repeated mistakes. It also protects against certainty drift, where an uncertain result becomes more confident each time it is copied into a new document. Preserve the original wording, source date, and limitations whenever information moves between people or channels.
Create reusable templates for decisions, not identical prompts. A strong template asks for audience, goal, source rights, required details, destination, rejection criteria, reviewer, and disclosure. The creative or investigative instruction should still be written for the specific task.
Measure Usable Outcomes Instead of Activity
Generation count, search count, or report count is not the business outcome. Measure reference fidelity, usable variations, correction rounds, cross-shot consistency, editing time, and the percentage of generated clips approved for the intended channel. These metrics reveal whether speed at the beginning creates extra correction later and whether the process improves across comparable tasks.
Review several examples rather than celebrating one unusually clean result or abandoning the workflow after one edge case. A small sample of repeated briefs shows which inputs are reliable, where review time accumulates, and which correction should move earlier.
Pair performance data with qualitative notes. A clip can receive attention while misrepresenting a product. A music match can feel convincing but identify the wrong version. A visibility score can rise while citations remain poor. A face report can be consistent yet still be subjective. A marketing image can look polished while changing the packaging. Approval must connect numbers with the real purpose.
Build a Small Benchmark Library
A benchmark library makes quality visible. Select five to ten representative tasks: one clean input, one typical input, one difficult edge case, and examples from the channels or audiences that matter most. Keep the expected outcome and review criteria beside each example. When the workflow, provider, model, or interface changes, rerun the same tasks before assuming the new version is better or worse.
The benchmark should include failures, not only showcase material. A difficult source reveals whether the system reports uncertainty, preserves important details, or produces a plausible result that could mislead a hurried reviewer. Keep the original input and the reason each output passed or failed. This is more useful than a gallery of attractive examples with no acceptance standard.
Refresh the library when the real workload changes. New products, new distribution formats, different audiences, and updated regulations can make an old test set irrelevant. Record the date of each benchmark and the environment in which it was run. The goal is not to create a permanent leaderboard; it is to maintain a practical reference for current decisions.
Know When a Manual Method Is Better
Automation is valuable when it reduces repetitive work or helps a team explore several directions. It is a poor fit when the task requires exact typography, legally significant wording, reliable identity verification, clinical interpretation, pixel-perfect reconstruction, or a factual conclusion that the available sources cannot support. In those cases, a conventional editor, authoritative catalog, qualified professional, or direct verification process may be faster and safer.
Use an escalation rule. If two controlled attempts fail the same acceptance criterion, stop generating and inspect the source or choose another method. If the error affects a product claim, identity association, face interpretation, attribution, license, or public factual statement, require a second reviewer before release. Clear escalation prevents teams from spending time on repeated variations that cannot solve the underlying problem.
Hybrid workflows are often strongest. Let the tool create a first draft, shortlist, visual concept, or evidence map; let a person perform the exact edit, factual check, rights review, or final layout. The division should follow risk and precision, not excitement about automation.
Rights, Privacy, and Responsible Use
Responsible practice is part of editorial and production quality. Teams should use references with appropriate rights and consent, avoid deceptive before-and-after claims, and disclose synthetic visuals when authenticity matters to the audience. Technical availability does not automatically create permission to reuse a file, profile, photograph, recording, or generated result.
Apply data minimization. Submit only what the task requires, restrict access to the people involved, and remove temporary material when it is no longer needed. Preserve licenses, consent records, source links, and disclosure decisions with the project notes.
When an output is synthetic, edited, inferred, incomplete, or model-dependent, describe it honestly. The level of disclosure should match the risk. A private concept test may need a small note; a commercial claim, identity association, face analysis, or documentary use may require stronger evidence and a prominent explanation.
A Publication and Handoff Checklist
Before approving the work, ask:
- Does the result answer the original question rather than a nearby one?
- Can the important details be compared with the source?
- Are linked claims supported by current first-party or original evidence?
- Have uncertainty, missing coverage, and model-dependent behavior been retained?
- Does the format work in the actual destination?
- Have rights, consent, privacy, and disclosure requirements been checked?
- Would a second reviewer understand why this result was accepted?
- Is there a clear next step if the result fails after publication?
If an answer is unclear, return to the relevant stage instead of generating more variations blindly. A better source, narrower question, or stronger acceptance criterion often improves the result more than a longer prompt.
Conclusion
A durable AI image editing and image-to-video production workflow combines a narrow brief, controlled testing, contextual review, and an honest record of limitations. The tool accelerates discovery or production, but the user still defines the purpose, protects the source, interprets uncertainty, and decides whether the result is fit for use.
The best next experiment is small. Choose one representative task, write the acceptance criteria, run one controlled attempt, and record what required correction. That evidence will show whether the workflow saves time without sacrificing accuracy, clarity, consistency, or responsibility.