

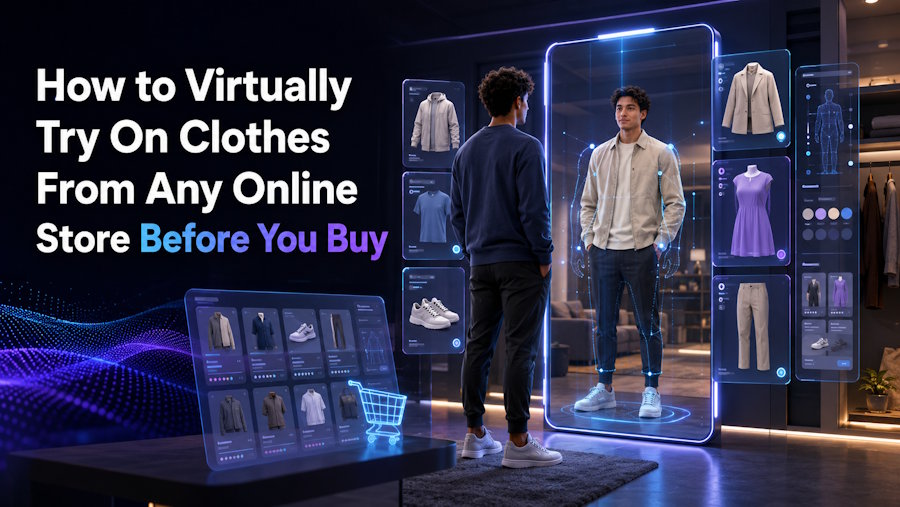
A dress may look perfect on the store’s model but feel completely different once you put it on. The color might compete with your skin tone, the waist may sit in the wrong place, or the oversized silhouette may overwhelm your proportions.
Size charts can help you choose a size, but they cannot show whether a color or design actually suits you. This is where an AI virtual try-on becomes useful.
Instead of waiting for an online store to add its own virtual fitting room, you can save the garment image from almost any product page and place it on a clear photo of yourself. In a few minutes, you can preview the overall color, neckline, length, proportions, and styling before deciding whether the item deserves a place in your cart.
The important part is knowing what a virtual try-on can reveal—and what you still need to verify separately.
| Shopping question | What virtual try-on can help you evaluate | What you should check elsewhere |
|---|---|---|
| Does the color suit me? | Overall color harmony and visual contrast | Color accuracy under different lighting |
| Does the cut flatter me? | Silhouette, neckline, waist placement, and visual proportions | Exact measurements and garment construction |
| Will this size fit? | General appearance of a fitted or oversized style | Size chart, garment measurements, and reviews |
| Does the fabric look good? | Approximate texture, pattern, and drape | Fabric weight, stretch, softness, and transparency |
| Does the outfit work together? | Color coordination and balance between garments | Comfort, movement, and practicality |
What Does It Mean to Virtually Try On Clothes?
To virtually try on clothes means using an AI tool to generate an image or video of you wearing a different garment. You provide two main inputs:
- A clothing image from an online store.
- A clear photo of yourself.
The AI identifies the garment’s visible features—such as its color, shape, neckline, sleeves, pattern, and length—and recreates the outfit on your photo while attempting to preserve your face, pose, body proportions, and background.
This is different from simply pasting a product image over your body. A capable AI clothes changer adjusts the garment around the pose, adds folds and shadows, and blends the clothing with the lighting in the original photograph.
The result is best treated as a personalized styling preview. It can help answer, “Do I like this shape and color on me?” It should not be treated as proof that a particular size will fit.
How to Virtually Try On Clothes From Any Online Store
The process works with product images from brand websites, marketplaces, secondhand stores, social shopping pages, and independent boutiques. You do not need the retailer to provide a built-in “Try On” button.
Step 1: Find the Best Product Image
Open the product page and examine all available images before saving one. The first lifestyle photograph is not always the best choice for a virtual try-on.
Choose an image with:
- The entire garment visible
- A front-facing or nearly front-facing angle
- Sharp details and good resolution
- A simple, uncluttered background
- Minimal obstruction from bags, hair, hands, or accessories
- Accurate-looking color and lighting
A flat-lay image, mannequin photograph, or clean product-only image usually gives the AI the clearest information. An on-model photograph can also work if the complete garment is visible and the pose does not hide important details.
Avoid images where the item is folded, cropped, heavily shadowed, or covered by another garment. If you are trying on a jacket, for example, choose a photograph where the lapels, shoulders, sleeves, closure, and hem are all visible.
For a patterned item, zoom in and confirm that the saved image clearly shows the print. Fine stripes, logos, embroidery, lace, and small hardware are more difficult to reproduce when the original image is tiny.
Step 2: Save the Clothing Image From the Product Page
On a desktop computer, right-click the clearest product image and select “Save Image As.” Save the largest available version when the store offers multiple image sizes.
On a phone or tablet, press and hold the image. Depending on the device and browser, select “Save to Photos,” “Download Image,” or a similar option.
Some stores disable direct image downloads or display product photos inside an interactive gallery. In that case:
- Open the image at its largest size.
- Hide thumbnails or other page elements if possible.
- Take a screenshot.
- Crop out prices, buttons, text, borders, and unrelated products.
The cropped screenshot should contain one clear garment rather than the entire shopping page. You can keep the product URL separately so you can return to the correct size and color after evaluating the preview.
Use retailer images for your personal shopping decision. Do not republish or use them commercially without the appropriate permission.
Step 3: Prepare a Useful Full-Body Photo
The quality of your own photo affects the value of the result just as much as the garment image.
Use a photograph with:
- One clearly visible person
- A front-facing, relaxed pose
- Your body visible from head to feet
- Arms slightly away from your torso
- Even, natural-looking light
- A simple background
- Sharp focus
- Minimal lens distortion
Wear relatively fitted, simple clothing in the original photograph. Leggings with a plain top, for example, give the AI a clearer view of your natural proportions than an oversized coat or a wide dress.
Avoid crossed arms, crossed legs, large handbags, long hair covering the neckline, or furniture hiding part of your body. These elements can make it harder for the AI to determine where the new garment should begin and end.
For more realistic proportions, step back and use the normal 1× camera rather than an ultrawide lens. Position the camera around the middle of your torso instead of photographing upward from the floor or downward from above. A timer or a photograph taken by another person usually works better than a mirror selfie in which the phone blocks your body.
Do not use a beauty filter or body-shaping effect. If the source photo changes your skin tone or proportions, the virtual outfit will be evaluated against an inaccurate version of you.
Step 4: Upload the Garment and Your Photo
Open How to Change Clothes and begin with the clothing section.
Clolo provides several ways to define the outfit:
- Use “One” for a dress, coat, jumpsuit, or individual garment.
- Use “Set” when you want to upload a separate top and bottom.
- Use multiple reference images when one picture does not show every important detail.
- Use a text description when you want to explore an outfit idea rather than copy one exact product.
Upload the product image you saved, then add your full-body photograph as the model image.
If you have multiple product pictures, use the clean front view as the main reference. Add another reference only when it contributes useful information, such as a clearer fabric texture, back design, sleeve detail, or print. Several conflicting product photographs can make the result less consistent.
Only upload photographs of yourself or someone who has given you permission.
Step 5: Add a Short Custom Instruction
A custom instruction is optional, but it can help preserve the features that matter most to your purchase decision.
For example:
Preserve the garment’s exact color, neckline, sleeve length, waist placement, buttons, and print. Keep my face, pose, body proportions, and background unchanged.
For a complete outfit, you might use:
Apply the uploaded top and trousers as one outfit. Keep the top untucked, preserve the wide-leg trouser silhouette, and do not change my body shape or pose.
Keep the instruction focused. Do not simultaneously ask the AI to change your pose, body, hairstyle, background, lighting, and outfit. When too many variables change, it becomes difficult to tell whether you are evaluating the garment or an entirely new photograph.
Step 6: Generate and Inspect the Result
Generate the virtual try-on and examine the result at full size.
Do not judge it only by whether the image looks attractive. Check whether the AI preserved the evidence you need:
- Is the neckline the correct shape and depth?
- Are the sleeves the correct length and volume?
- Does the waist sit where it appears to sit in the product image?
- Is the hem approximately correct relative to your body?
- Are the print, buttons, pockets, and closures still present?
- Did the AI preserve your shoulders, waist, hips, and overall proportions?
- Did it quietly slim, lengthen, or reshape your body?
- Does the color remain reasonably close to the product image?
If an important feature is missing or your body shape changes noticeably, regenerate before drawing a conclusion.
For a more reliable comparison, keep the same model photo, pose, background, and instructions while testing different garments. Changing only one variable makes it easier to see which color or silhouette works best.
How to Judge Whether the Color Suits You
Virtual try-on clothes tools are especially helpful when you are considering a color you do not normally wear. Instead of imagining the shade in isolation, you can see it next to your face, hair, and overall proportions.
Ask yourself:
- Does the color bring attention to my face or overpower it?
- Does it create enough contrast with my skin and hair?
- Does the shade coordinate with clothes I already own?
- Does a bright color dominate my entire silhouette?
- Would a warmer, cooler, lighter, or darker version work better?
- Does the garment still look appealing without the retailer’s styled background?
For a direct comparison, generate the same garment in two available colorways using the same full-body photo. This is more useful than comparing two different store models photographed under different lighting.
However, no screen-based preview can guarantee exact color. Store photography, image editing, your screen brightness, room lighting, and AI generation can all shift a shade. A virtual try-on may help you choose between navy and beige, but it may not reliably distinguish between two nearly identical shades of cream.
Before ordering, compare the generated result with the product’s written color name, close-up fabric images, customer photos, and reviews that mention color accuracy.
How to Evaluate the Garment’s Shape and Proportions
“Does it fit?” is actually several different questions. A virtual preview is better at answering some of them than others.
Focus first on the garment’s visual structure:
Shoulder line
Check whether the design looks balanced at your shoulders. A strong shoulder, dropped seam, puff sleeve, or narrow strap can change the apparent width of your upper body.
Neckline
Compare crew necks, V-necks, square necks, halter styles, and high collars. The neckline affects how much visual space appears between your face and torso.
Waist placement
Look at where the garment visually defines the waist. A high waist, natural waist, dropped waist, or shapeless cut can change the apparent length of your upper and lower body.
Garment volume
Consider whether oversized sleeves, a full skirt, a boxy jacket, or wide-leg trousers create the amount of volume you want. Check the balance of the complete silhouette rather than focusing on one area.
Hem position
Estimate where tops, jackets, skirts, and dresses end relative to your body. A jacket ending at the widest part of the hip can create a different effect from one ending above or below it.
These observations can help you eliminate an unflattering design before ordering. They still cannot confirm whether a seam will pull, a waistband will feel tight, or a sleeve will restrict movement.
Use the Three-Layer Purchase Test
A good virtual try-on should be one part of your shopping decision, not the entire decision.
Layer 1: Visual suitability
Use the AI preview to judge:
- Color direction
- Neckline
- Silhouette
- Waist placement
- Approximate length
- Outfit coordination
- Overall style
Layer 2: Size evidence
Check the retailer’s:
- Body size chart
- Garment measurements
- Model height and displayed size
- Fit description
- Customer reviews
- Petite, tall, or plus-size options
When possible, compare the garment’s actual measurements with a similar item you already own and like. This is more dependable than comparing the chart only with your body measurements.
Layer 3: Fabric behavior
Review:
- Fiber composition
- Stretch percentage
- Fabric weight
- Lining
- Transparency
- Closure type
- Care instructions
- Comments about shrinking, pilling, or stiffness
A generated image may make a fabric look soft and fluid even when the real garment is thick, rigid, or unlined. Product details and customer feedback provide the evidence the image cannot.
Only place the order when the visual preview, measurements, and material information all support the same decision.
Best Practices for More Realistic Results
Use these habits whenever you virtually try on clothes from an online store:
- Start with the highest-resolution product image available.
- Use a clean front view before adding detail photographs.
- Keep your full body visible and unobstructed.
- Use an unfiltered photograph taken in even light.
- Test one garment or controlled outfit combination at a time.
- Keep the same model photo when comparing products.
- Write short instructions focused on garment details.
- Regenerate if the AI changes your body or removes important design elements.
- Compare the result with the original product image side by side.
- Confirm size and fabric information before buying.
For difficult garments such as sheer dresses, asymmetrical designs, layered outfits, reflective fabrics, or highly detailed prints, generate more than one result. If repeated generations disagree about an important feature, treat that feature as uncertain.
Common Virtual Try-On Mistakes
Using the entire product-page screenshot
A screenshot containing prices, text, thumbnails, and several color options gives the AI too much unrelated information. Crop it to the individual garment.
Choosing the most dramatic store photo
A beautifully styled campaign image may hide the garment’s true shape. A plain product photograph is usually more informative.
Uploading a cropped selfie
A face or waist-up photograph cannot reliably show dress length, trouser proportions, or the balance of a complete outfit. Use a full-body image.
Wearing bulky clothing in the model photo
A loose coat or oversized sweater can obscure your proportions. Start with simple, relatively fitted clothes.
Treating the generated fit as a size recommendation
AI may render the garment as if it fits neatly, even when the selected retail size would be too tight or too loose. Always check measurements separately.
Ignoring AI-generated body changes
A flattering result is not useful if the tool has narrowed your waist, lengthened your legs, or altered your shoulders. Compare the output with your original photo.
Changing too many variables
If you change the pose, background, hairstyle, lighting, and garment simultaneously, you lose a reliable basis for comparison. Keep everything except the clothing consistent.
Expecting exact fabric behavior
A still image cannot tell you whether wool feels itchy, denim is rigid, knitwear stretches, or a dress becomes transparent in daylight. Read the composition and reviews.
What Virtual Try-On Can and Cannot Tell You
A virtual try-on can help you evaluate:
- Whether a new color direction appeals to you
- Whether the neckline complements your proportions
- Whether the silhouette feels balanced
- Whether a garment is too visually plain or too dominant
- Whether separate items work as an outfit
- Whether an unfamiliar style is worth investigating further
It cannot reliably determine:
- Your correct retail size
- Exact garment measurements
- Physical comfort
- Fabric softness or weight
- Stretch and recovery
- Movement when walking or sitting
- Exact color under real-world lighting
- Whether seams, zippers, or waistbands will feel restrictive
Think of the output as a visual filter for your shortlist. It can help you reject an unsuitable style or feel more confident about a promising one, but it should not replace the product information.
Frequently Asked Questions
Can I virtually try on clothes from any website?
Yes. If you can save or screenshot a clear product image, you can usually upload it to an independent AI virtual try-on tool. The store does not need to provide its own virtual fitting room.
Can I use a screenshot of the clothing?
Yes. Crop the screenshot closely so it contains one complete garment without prices, buttons, text, thumbnails, or other products. A direct, high-resolution product image generally produces better detail.
Can I try on a complete outfit?
Yes. Upload separate references for the top and bottom or use a clear image of the complete outfit. Separate references usually provide better control when the store sells the pieces individually.
Does virtual try-on show my correct clothing size?
No. A generated preview can show the general style and silhouette, but it does not measure your body or guarantee how a specific size will fit. Use the retailer’s size chart and garment measurements.
Can I use virtual try-on on my phone?
Yes. You can save or screenshot the product image, upload it from your photo library, add your full-body photograph, and generate the result in a modern mobile browser.
What clothing photos produce the best results?
Clean flat lays, mannequin images, product-only photos, and simple on-model images usually work well. The full garment should be visible, sharp, and unobstructed.
Is virtual try-on useful for online shopping?
It is most useful for evaluating color, silhouette, proportions, and outfit coordination. It becomes more reliable as a purchase aid when combined with measurements, fabric details, customer photos, and reviews.
Try the Look Before You Commit
Online shopping does not have to begin with a guess and end with a return. By saving a clean product image and combining it with a realistic full-body photo, you can preview clothes from almost any online store before placing an order.
Use the generated image to judge the color, neckline, waist placement, length, volume, and overall style. Then verify the size and material with the retailer’s measurements, descriptions, and customer feedback.
Virtual try-on clothes technology cannot reproduce the physical fitting-room experience perfectly. What it can do is give you a fast, personalized visual test—helping you narrow your options, compare unfamiliar styles, and make a more informed decision before you buy.

