
The Samsung Galaxy S10 release date was on March 8 of 2019 and is still a pretty powerful smartphone (even though the reselling price, where it loses much value just one year after your purchase). One of those awesome features of this smartphone is its stunning 3 cameras of 12MP + 16MP + 13MP with Auto face detection, Digital Zoom, Auto Flash, Face detection, Touch to focus and Exposure compensation, ISO control settings capture stunning shots and videos with a resolution of 4000 x 3000 Pixels. This is a thing that as a developer probably would never use 🤣, however in the last days, for an optional course of my university, I had to provide a picture in RAW format of a landscape.
In the beginning, I thought that it was necessary to ask someone for a professional camera that allows capturing a picture in the mentioned format. Fortunately, my curiosity asked if my smartphone would allow doing that and unsurprisingly it does, not by default, but there's a really easy way to achieve it, and I'm going to explain how to take a picture in RAW format with your Samsung Galaxy S10.
1. Open the camera settings
The first thing you gotta do is to open the settings of the camera, you can simply open the camera app and click on the gear in the top-left area of the screen:
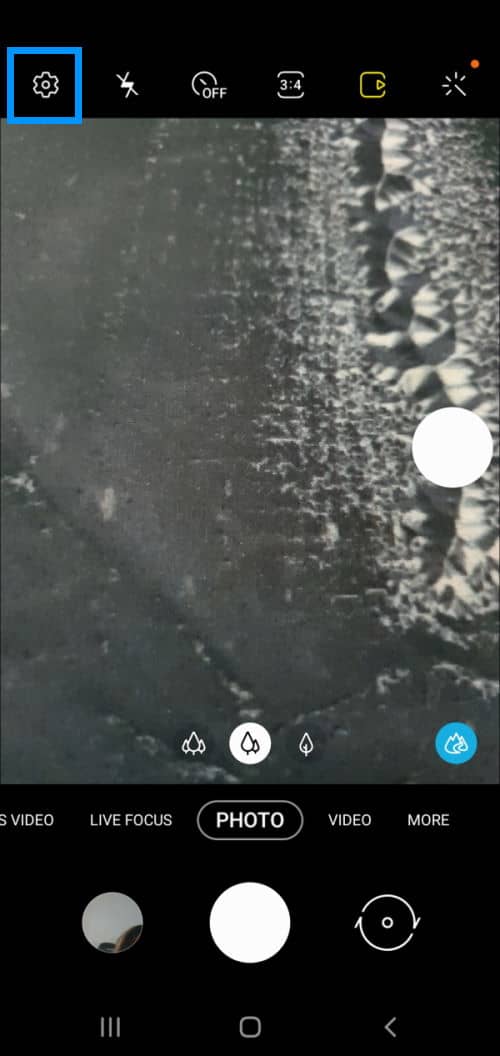
This will launch the settings menu of the Camera.
2. Open Save Options
In the camera settings, search for the "Save options" item and select it:
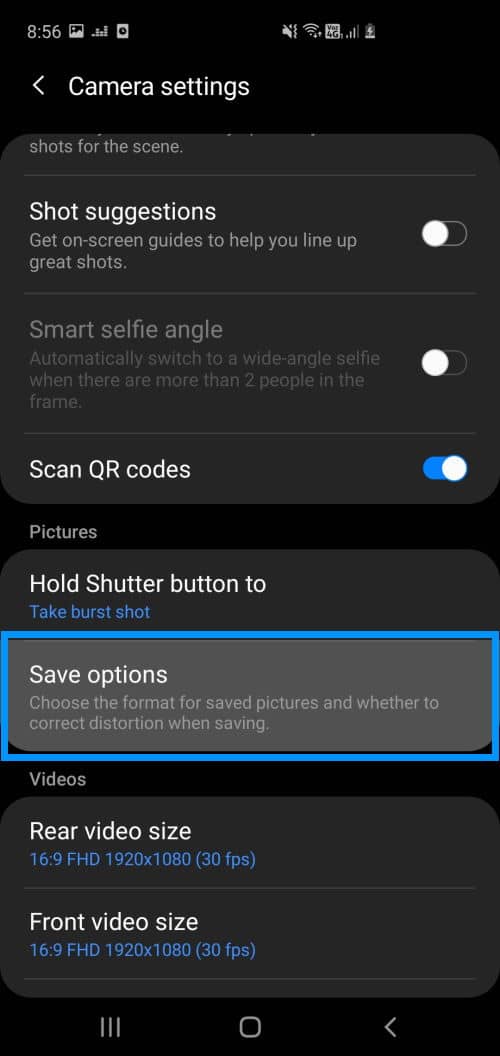
This option will allow you to choose the format for saved pictures and whether to correct distortion when saving it.
3. Enable saving RAW copies
To finish the configuration steps, enable the Save RAW copies option. This will store the taken picture in both formats RAW and JPEG when you use the PRO mode of the camera.
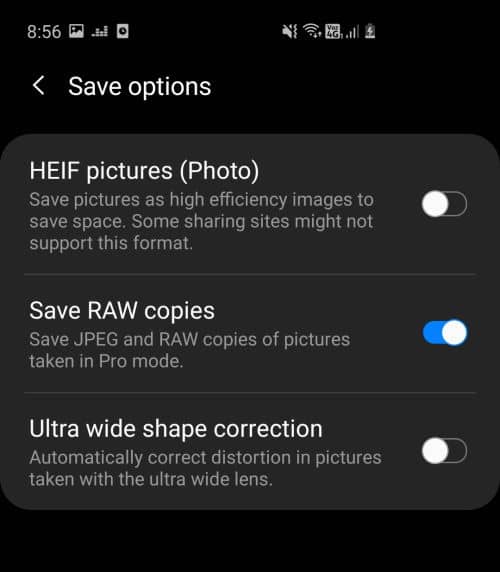
Now you only need to take the photos in the PRO mode and they will be stored in RAW format as well.
4. Open Camera in Pro Mode
Finally, in order to take photos that are stored in RAW format, you need to open the camera in PRO mode. You can do this by simply swiping to the left in the modes menu at the bottom of the camera and selecting "More". In this area, you will find the PRO icon, select it:
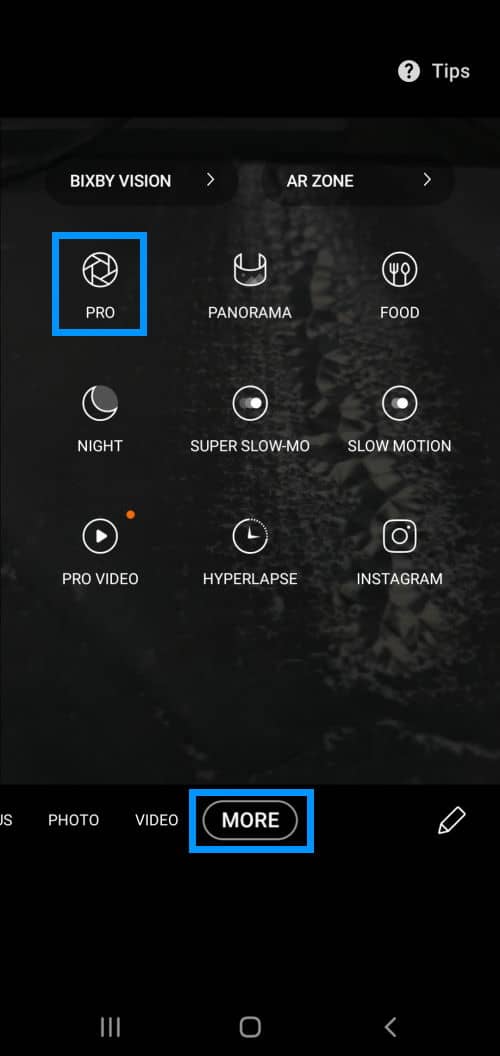
And the camera will launch the PRO mode where you can select multiple stuff:
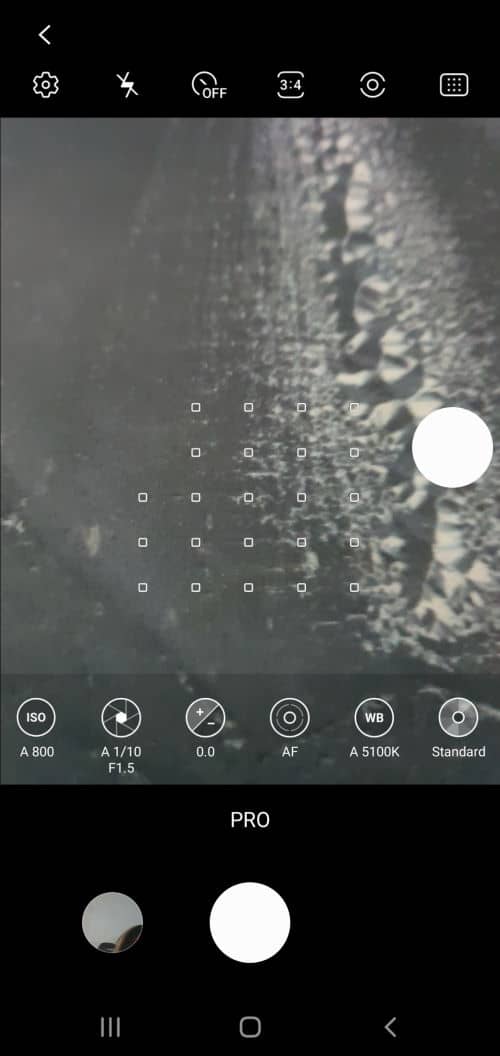
The PRO mode puts the control in your hands so you get the very photo and video you want. Manually adjust settings such as ISO, shutter speed, and exposure levels, express your own style with filters or adjust the white balance settings to accommodate different lighting conditions.
5. Take your photos!
When you take a photo in PRO mode, it will be automatically stored in both formats (RAW and JPEG), so you will have 2 files in the gallery. The file in RAW format will have the RAW tag on the display:
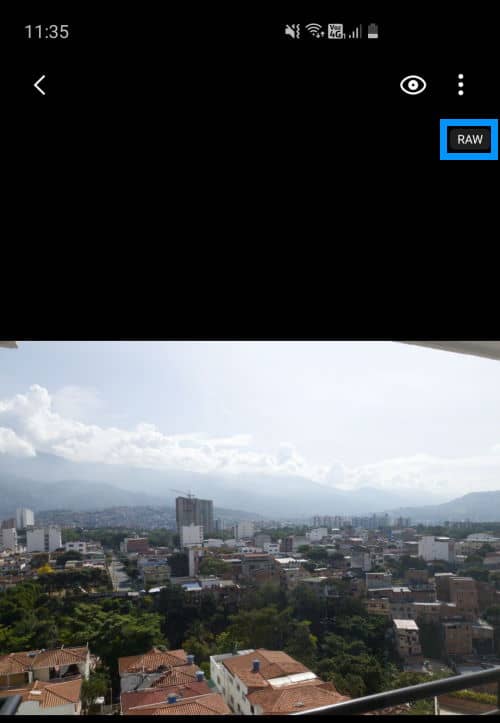
You can then do whatever you need with the file, either uploading it somewhere or saving it to your computer.
Have fun ❤️!

